
WHY 3D SPHERES ARE IMPORTANT

In the last tutorial we learned about drawing 3D shapes, and I hinted a little that 3D Spheres were particularly important in pencil portrait drawing.
So, now I will tell you why.
The human face is made up of many different elements; eyes, cheeks, lips, a chin and so on. None of these elements are flat, they are all textured and filled out.
By breaking the human face down into these separate elements, you will notice that many of the elements have a spherical resemblance.


In the photograph to the right, I have circled at least 19 spherical resemblances which make up this little boy’s face.
Maybe you can see more than the nineteen I have circled; for example the lips have hundreds all bunched very closely together to create almost eclipse shapes.
There are also the two pupils in the eyes, and even the glint of light reflecting off them is a spherical shape.
Now you can see just how much of the human face is made up from 3D Spheres, you should be getting a clearer understanding of why they are so important in pencil portraiture.
Drawing A 3D Sphere
In the last drawing tutorial, Creating Depth With 3D Drawing, we created a cubic shape using the origin point and the three axis.
A 3D Sphere is different because unlike a cube we have no origin point or axis to work from, so we have to use a bit of our own common sense and imagination for this one, so you will need to get your creative juices flowing.
We also learned about highlights, shadows and mid-tones. We will be using these again, but we will also be introducing two more tones; core shadows and cast shadows.
These two tones are basically the building blocks you will use to create a shadow effect of the subject.
When we finish this 3D Sphere tutorial- and I should warn you, it looks a lengthy one but you should be able to complete it within thirty minutes- you should end up with something like this.


On this diagram you can see all the tones we have already learned about, as well as the two new ones.
How To Draw A 3D Sphere
For this you will need;
Your 2B pencil
A sheet of paper
A Ruler
Putty Rubber
Your Shading Guide
Your Blending Tool
A piece of tissue to rest your wrist
And an egg cup- or something similar in shape.

A sheet of paper
A Ruler
Putty Rubber
Your Shading Guide
Your Blending Tool
A piece of tissue to rest your wrist
And an egg cup- or something similar in shape.
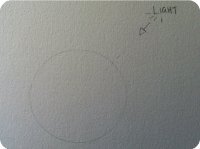
1.) Place your egg cup upside down onto the sheet of paper, and in a light outline, draw around it.

You will be left with a perfect circle.
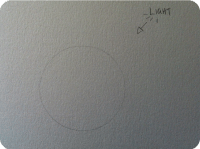
2.) Next, decide from which direction you will place your light-source.
For the sake of following this tutorial, I suggest the upper-right hand side.

3.) Using your ruler, very lightly mark out a guideline straight from the light-source to approximately 1cm inside the circle.
This is where we are going to place the center of our highlight.

 4.) In a very light outline draw a small oval shape around the point we have marked as the center of our highlight.

5.) Now grab your egg cup again, and place it so the opposite side of the light-source can just be seen, creating an eclipse effect. Mark this out in a light outline.

This is where our shadow will be.

6.) Repeat this process four more times, moving towards the light-source, and making each eclipse shape slightly wider than the last.
You should stop when you get about half way across the circle.
These will be the mid-tones.

7.) You will notice that the ends of these eclipses don’t follow the spherical shape once you get about half way.
You can correct this yourself by simply bending the ends to follow the shape of the circle.

8.) For the last few mid-tone guidelines you will need to do this freehand.
The easiest way is to use the oval we created for the highlight as a guide, and work your way out to create three oval shapes.
You can leave a wide gap in the middle. You should now have 10 separate eclipses.

9.) In the eclipse shape we decided to use as our shadow, using your Shading Guide and the Pencil Techniques we have learned in previous tutorials, shade this in a 10.

Remember, you can create a Shading Guide for yourself in Shading Techniques With Pencil.
You should now have something like this.

10.) Sticking with your shading guide, shade the next eclipse in a 9.
The next in an 8, and so on until you have shaded the last eclipse in a 2, and the highlight oval is left untouched (shade 1).

11.) Next, use your blending tool and the scumbling technique to blend the different tones together.
Remember to work from the lightest part to the darker parts to avoid adding too much lead to parts we don’t need it.


12.) Now we are going to add the Cast Shadow. This is where the subject (3D Sphere) is obstructing the light-source from getting to, so we will place this directly opposite to our light-source.


13.) Now we can add our core shadow. This is the part of the image where absolutely no light can reach, such as the very base of the subject. Use the diagram to add your core shadow in a shade of 10.


14.) Now we have the core shadow in place, and a rough guideline for our cast shadow, we can shade this area in, gradually moving downwards from a shade 10 (core shadow) to a shade 1, where the light-source can reach.


15.) Using your blending tool and a scumbling technique, blend the shadow tones together.


16.) We have now nearly finished our 3D Sphere.
All we have left is to add some more highlights, and the outline.
So using a piece of putty rubber formed into a point, dab away any lead which may have been smudged or blended in our original ovals highlight, and match the tones up smoothly around it if need be. You may also wish to use your blending tool again here to smooth the lead out.


17.) Another place to add some highlights using your putty rubber is on the left side of the 3D sphere near the shadow. This is because the light bounces off the surface and reflects back on to the subject.


18.) The final part is to add our heavy outline. This is important to help the image stand out from the page, so take your time.


And there you have your finished 3D Sphere. Well Done!
This tutorial was the hardest yet, so if you managed to stick it out and create your first 3D sphere, then you are well on your way now.
Remember, spheres are everywhere. If you can nail a sphere down perfectly, then that is half the battle done in pencil portraiture, so keep practising them over and over until you can do one without an egg cup and the guidelines.
You now know so much already about pencil drawing, including the different tools, techniques and terms that pencil artists use!
THANK YOU
🙏🙏🙏🙏🙏
THANK YOU
🙏🙏🙏🙏🙏


