About Me

My photo
I am a Wife, Mother and a self taught artist. Drawing and paintings are my basic interest from my childhood. And i wanted to share my knowledge with all of you people, who somehow not able to get proper education in arts. I try to do my best. If you like my blog plz let me know and plz put a comment or email me.

Tuesday, December 7, 2021

Madhubani Painting Introduction

 Types of Madhubani Painting

Styles. Madhubani art has five distinctive styles: Bharni, Kachni, Tantrik, Godna and Kohbar


Bharni– The Bharni style painting is one of the five styles of Madhubani paintings. It is a very profound art form, precisely known for its vibrant and bright colors. This art form was traditionally used for portraying Hindu deities and their historical contribution to India mythology. Bharni is a Hindi word, which means ‘filling’. The name of the art form expresses the style of painting full of color and design. Usually, the Bharni paintings depict the pictures of Hindu gods and goddesses.


Kachni– Katchni painting style in Madhubani paintings is a traditional style of picture coming from the Kayastha community. This particular art form has a unique individual style, mainly made using a monochrome or only two colors. This style of painting attracts the audience since they highlight the peculiar features of natural aspects with a limited color range. Kachin painting style has come a long way from a small town of Ranti village in Madhubani District. The distinction in form is mainly seen in the linework of the paintings. These paintings primarily depict animals, flowers, and other natural aspects.


Tantrik– The Tantrik style of painting of Mithila or Madhubani art is a very distinct style of painting. This style represents the traditional and religious texts in a very precise manner.  Tantra is an original text describing the Hindu religion and its aspects. Therefore, most of the paintings of Tantrik style have the influence of Tantra in its painting patterns. These paintings traditionally depict Hindu mythological characters, which hold the strong belief of the Hindu public. People in India generally involve these paintings in their home or any special occasion for prayers with firm faith.


Godna– Godna is also among the five styles of Madhubani art. This art form is a unique and beautiful style of Mithila painting. Godna painting style is considered to be one of the most straightforward methods in the race of Mithila art style. The discovery of Godna Madhubani painting is believed to be done by Chanu Devi in which she used a pen made of bamboo and kajal to make the design. This art precisely signifies natural creatures such as animals, birds, plants, tree of life, and flowers. This painting style is famously done on canvas, but people also tend to use them as a tattoo.


Kohbar– Kobar in Madhubani painting is one of the most popular forms of the style of Mithila art. Kobar is a highly valued word when we speak of Madhubani art as it has a linkage with a Hindu wedding ceremony. Kobar art also goes by the name of Tantra Raj, Yog Yogini, and Shiv Shakti, which means power with the blessing of Lord Shiva resides. This painting mainly depicts Hindu wedding ceremonies, and they are primarily made on the walls of the bride and groom’s home.


Monday, December 10, 2018

How To Draw & Color A Cricket

Hey Guys, Check out my new video on Kids Series. Here we can see how to draw and color A Cricket (Insect).


Materials that I have used in this tutorial are:-
Flair Pop Gel pen to draw basic design
Faber Castell Oil pastels 25 colors set for coloring.
Cotton Swabs for blending.


Please like, comment, share and subscribe to my channel and show your support towards my art and work.
 

For sponsorship Contact me on my email at shilsartwork@gmail.com

Follow me on Instagram for lots more videos and my artwork

or Facebook @shilsartwork

or Join my facebook group : learn drawing easily

Also I would love to see your mails.
You can write me on...
Mrs Shilpa Gajarlwar,
TA-1, 3rd Floor, Ramchandra Rukmini Apt,
Barde Complex, Above APna Bhandar,
Friends Colony, Katol Road,
Nagpur, Maharashtra, India
440013

Thank you

Monday, October 29, 2018

How To Draw Little Spider for kids

Hello Friends, Welcome to my blog.
As promised I am going to start a drawing series for the little ones today. This is for kids it doesn't mean that elders can't do this. Anyone who is intersted can do this. Learning is non stopable process and it goes on until the life. So lets get started with our first tutorial of this series.
Today I am going to show you how to draw a little Spider with step by step process. 
And also I have included a small video for the same. 


As shown in the above image we have to start with the eyes. First draw two small little circles for the eyes. Make pupils in it. Draw eyebrows. Then draw a curve line just below the eyes for the lips. Make two small teeths on both the end of the lips. Then go for the head part. Make a half circle above eyes, give 2 little curves for the cheek both side. Then make beard joining both side of the cheeks. Then make legs as per shown in the image. Make some zigzag hairs on the head. And your little spider is ready in few easy steps. 
Check out the video to see how I draw it.


To view realtime video plz click on the link given below.
Dont forget to like and subscribe my channel as there are more upcoming videos of drawing and painting. Alse share your views with me about this drawing as it is very important to me.
Thank you for visiting my blog.
🙏🙏🙏🙏🙏

Saturday, October 6, 2018


Hello Friends,

welcome to my blog once again.

I know many of you are following my blog continuously and doing well with your drawing practices. I have got many positive feedback from many people. And also shocked to see their progress in drawing. I would like to thank those people who give me courage to continue with this blog.


Today I just wanted to share a news with all of you learners that I am going to start a new drawing series for kids, by which they can easily draw day to day objects, animals, trees, birds, doodles and many more things.

If you wish you can also learn and teach to your children. Now a days doodles are also getting more popular so I also included it to this series. I hope I will get a good response from you for this series. Also If you have any suggestion you can message, mail or comment.

Thank you again for visiting my blog.

Tuesday, April 10, 2018

Drawing A 3D Sphere


WHY 3D SPHERES ARE IMPORTANT

In the last tutorial we learned about drawing 3D shapes, and I hinted a little that 3D Spheres were particularly important in pencil portrait drawing.
So, now I will tell you why.
The human face is made up of many different elements; eyes, cheeks, lips, a chin and so on. None of these elements are flat, they are all textured and filled out.
By breaking the human face down into these separate elements, you will notice that many of the elements have a spherical resemblance.


In the photograph to the right, I have circled at least 19 spherical resemblances which make up this little boy’s face.
Maybe you can see more than the nineteen I have circled; for example the lips have hundreds all bunched very closely together to create almost eclipse shapes.
There are also the two pupils in the eyes, and even the glint of light reflecting off them is a spherical shape.
Now you can see just how much of the human face is made up from 3D Spheres, you should be getting a clearer understanding of why they are so important in pencil portraiture.
Drawing A 3D Sphere
In the last drawing tutorial, Creating Depth With 3D Drawing, we created a cubic shape using the origin point and the three axis.
3D Sphere is different because unlike a cube we have no origin point or axis to work from, so we have to use a bit of our own common sense and imagination for this one, so you will need to get your creative juices flowing.
We also learned about highlights, shadows and mid-tones. We will be using these again, but we will also be introducing two more tones; core shadows and cast shadows.
These two tones are basically the building blocks you will use to create a shadow effect of the subject.
When we finish this 3D Sphere tutorial- and I should warn you, it looks a lengthy one but you should be able to complete it within thirty minutes- you should end up with something like this.


On this diagram you can see all the tones we have already learned about, as well as the two new ones.
How To Draw A 3D Sphere
For this you will need;
Your 2B pencil
A sheet of paper
A Ruler
Putty Rubber
Your Shading Guide
Your Blending Tool
A piece of tissue to rest your wrist
And an egg cup- or something similar in shape.


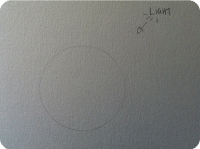
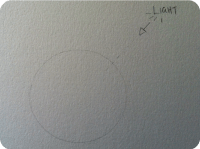
1.) Place your egg cup upside down onto the sheet of paper, and in a light outline, draw around it.


You will be left with a perfect circle.


2.) Next, decide from which direction you will place your light-source.
For the sake of following this tutorial, I suggest the upper-right hand side.


3.) Using your ruler, very lightly mark out a guideline straight from the light-source to approximately 1cm inside the circle.


This is where we are going to place the center of our highlight.


 4.) In a very light outline draw a small oval shape around the point we have marked as the center of our highlight.


5.) Now grab your egg cup again, and place it so the opposite side of the light-source can just be seen, creating an eclipse effect. Mark this out in a light outline.


This is where our shadow will be.


6.) Repeat this process four more times, moving towards the light-source, and making each eclipse shape slightly wider than the last.
You should stop when you get about half way across the circle.
These will be the mid-tones.


7.) You will notice that the ends of these eclipses don’t follow the spherical shape once you get about half way.
You can correct this yourself by simply bending the ends to follow the shape of the circle.


8.) For the last few mid-tone guidelines you will need to do this freehand.
The easiest way is to use the oval we created for the highlight as a guide, and work your way out to create three oval shapes.
You can leave a wide gap in the middle. You should now have 10 separate eclipses.


9.) In the eclipse shape we decided to use as our shadow, using your Shading Guide and the Pencil Techniques we have learned in previous tutorials, shade this in a 10.


Remember, you can create a Shading Guide for yourself in Shading  Techniques With Pencil.

You should now have something like this.


10.) Sticking with your shading guide, shade the next eclipse in a 9.
The next in an 8, and so on until you have shaded the last eclipse in a 2, and the highlight oval is left untouched (shade 1).


11.) Next, use your blending tool and the scumbling technique to blend the different tones together.
Remember to work from the lightest part to the darker parts to avoid adding too much lead to parts we don’t need it.


12.) Now we are going to add the Cast Shadow. This is where the subject (3D Sphere) is obstructing the light-source from getting to, so we will place this directly opposite to our light-source.

13.) Now we can add our core shadow. This is the part of the image where absolutely no light can reach, such as the very base of the subject. Use the diagram to add your core shadow in a shade of 10.

14.) Now we have the core shadow in place, and a rough guideline for our cast shadow, we can shade this area in, gradually moving downwards from a shade 10 (core shadow) to a shade 1, where the light-source can reach.


15.) Using your blending tool and a scumbling technique, blend the shadow tones together.


16.) We have now nearly finished our 3D Sphere.
All we have left is to add some more highlights, and the outline.
So using a piece of putty rubber formed into a point, dab away any lead which may have been smudged or blended in our original ovals highlight, and match the tones up smoothly around it if need be. You may also wish to use your blending tool again here to smooth the lead out.

17.) Another place to add some highlights using your putty rubber is on the left side of the 3D sphere near the shadow. This is because the light bounces off the surface and reflects back on to the subject.

18.) The final part is to add our heavy outline. This is important to help the image stand out from the page, so take your time.

And there you have your finished 3D Sphere. Well Done!
This tutorial was the hardest yet, so if you managed to stick it out and create your first 3D sphere, then you are well on your way now.
Remember, spheres are everywhere. If you can nail a sphere down perfectly, then that is half the battle done in pencil portraiture, so keep practising them over and over until you can do one without an egg cup and the guidelines.
You now know so much already about pencil drawing, including the different tools, techniques and terms that pencil artists use!
THANK YOU
🙏🙏🙏🙏🙏


Thursday, March 29, 2018

Learn How To Do 3D Drawings


Creating Depth with 3D Drawing


Learn How To Do 3D Drawings
One of the most aspired to techniques of pencil drawing is learning how to create shapes and texture using 3D drawing.
3D means ‘Three- Dimensional’. Three-dimensional refers to the number of axis running from an origin point. Like 2D has two axis, X and Y are running from one origin point, 3D has three axis, X, Y and Z run from one origin point.


The most visible difference between 2D and 3D is a 2D drawing is flat, whereas a 3D drawing stands out from the page. This is because the added Z axis has added a perspective angle to the drawing.


Create 3D Shapes
This will show you how to draw a 3D square; called a cube, and is very simple.
For it, you will need;
Your 2B Pencil
A Sheet of Paper
A Ruler
Your Shading Guide that you created in the Shading Techniques with Pencil tutorial

1. ) Draw a  5cmx5cm square. This is square A.


Tip; A square has four 90° angles where each two sides meet.

Use the corner of your ruler to ensure you create these 90° angles, and create a proper square.


2.) Now draw another 5cmx5cm square slightly higher and to the left of the first square, making sure the two squares overlap. This is square B.
You should now have three points on square B outside of square A, and one ( bottom right) inside square A.


4.) Using a ruler, draw lines to connect each corner of square A to the corresponding corner of square B. For example, top-left corner of square A should connect to the top-left corner of square B, and so on. Refer to the diagram on the left to avoid confusion.
What you now have is a transparent cube. However, to add the illusion the cube is ‘standing out’, we will need to do a bit more work and add some shading.


5.) First, erase the three lines which emerge from the one point we have in square A.
We don’t need these, as the cube will no longer be transparent once we have shaded it in.

You should now have something like this, with 3 sides; or, 3-Dimensional. Or, 3D.


Now, remember that Shading Guide we created a few tutorials back?…Grab it, because we are going to use it to add three shades to our cube, each to every side.
A Bit More About Shading Elements That Create 3D Shapes
Before we do though, I would just like to introduce you to Highlights, Shadows and Mid-tones.
These are essentially your building blocks for creating depth and texture within a pencil drawing.
Highlight; This part of the subject will be the part which is directly facing the light source.
Shadow; This part of the subject will be the part which is facing away from the light source.
Mid-tone; This part of the subject will be the part which is neither directly facing the light source, or the part facing away from the light source. It is the bit in the middle.
With our shading guide, this is how the highlight, shadow and mid-tone would look.


We are going to add these tones to our new 3D cube we have created.
6.) First we will add the highlight. This is the side of the cube facing the light. In this case it is the front which I have labelled Side 1.
For this we will use shade 3 on our Shading Guide.


7.) Next, we will add the shadow. This is the side of the cube facing away from the light.
For this we will use shade 7 on our Shading Guide.


8.) And finally, we will add the mid-tone. This is the side of the cube which is neither in the light or the shadow. It is in the middle.
For this we will use shade 5 on our Shading Guide.


And there you have it! …a very basic, but effective 3D drawing.
In the next tutorial, we will learn more 3D techniques. If you like this tutorial then please let me know your views on it. Also I would like to know that what you want to learn in my next tutorials. Please share your art with us.
THANK YOU
🙏🙏🙏🙏🙏


Madhubani Painting Introduction

  Types of Madhubani Painting Styles . Madhubani art has five distinctive styles: Bharni, Kachni, Tantrik, Godna and Kohbar Bharni – The Bha...